Continuous Integration (CI) is a practice of merging all developers' work several times a day. It's important to note that this practice is better achieved when following workflows different from pull request ones; opening multiple pull requests can slow down the development process and also create the famous "merging hell".
Set up a continuous integration using Jenkins and Github is pretty easy. In this example, we'll be triggering a Jenkins job as soon as we push new changes to the repository. To obtain all benefits of CI, it's highly recommended that the project implements Unit Tests and/or Integration Tests (TDD) so that every time we push new changes, the CI server will compile, analyze code quality, and execute the tests.
Source Code
The source code for this tutorial can be found at
https://github.com/metiago/starter-ci. It's a Vert.x API that contains some unit tests and integration tests to represent a real scenario when developing applications that will be integrated into CI. Note that the pom.xml contains important configuration to handle unit tests and integration tests in different folders.
Jenkins Server
Before spinning up our Jenkins server, we have to create some SSH keys, which will be used in Jenkins to pull our repository code.
Open a terminal and create a folder called jenkins-server. In this folder, generate the SSH keys by typing:
ssh-keygen -t rsa -b 4096 -C "myemail@mycompany.com"
In the same folder, create a file called Vagrantfile with the content below:
# -*- mode: ruby -*-
# vi: set ft=ruby :

# $script = <<-SCRIPT
#   echo 'My Custom Script...'
# SCRIPT

# All Vagrant configuration is done below. The "2" in Vagrant.configure
# configures the configuration version (we support older styles for
# backwards compatibility). Please don't change it unless you know what
# you're doing.
Vagrant.configure("2") do |config|
  # The most common configuration options are documented and commented below.
  # For a complete reference, please see the online documentation at
  # https://docs.vagrantup.com.

  # Every Vagrant development environment requires a box. You can search for
  # boxes at https://atlas.hashicorp.com/search.
  config.vm.box = "hashicorp/bionic64"
  # config.vm.box_version = "20170922.0.0"
  # config.vm.provision "shell", inline: $script
  # config.vm.provision :shell, :inline => "/home/vagrant/gogs/gogs web &", :run => 'always', privileged: false
  config.vm.provision "file", source: "id_rsa", destination: ".ssh/id_rsa"
  config.vm.provision "file", source: "id_rsa.pub", destination: ".ssh/id_rsa.pub"

  config.trigger.after :up do |trigger|
    trigger.name = "Starting Gogs"
    # trigger.run_remote = {inline: "export PATH:$PATH:/home/vagrant/gogs"}
    trigger.run_remote = {inline: "/home/vagrant/gogs/gogs web"}
  end

  config.vm.network "forwarded_port", guest: 8080, host: 8085
  config.vm.network "forwarded_port", guest: 3000, host: 3000
  # config.vm.network "private_network", ip: "192.168.33.10"

  # config.vm.network "public_network", ip: "192.168.33.17"
  config.vm.network "private_network", ip: "192.168.50.4"

  config.vm.provider "virtualbox" do |v|
    v.memory = 4096
    v.cpus = 2
  end

  # Enable provisioning with a shell script. Additional provisioners such as
  # Puppet, Chef, Ansible, Salt, and Docker are also available. Please see the
  # documentation for more information about their specific syntax and use.
  config.vm.provision "shell", inline: <<-SHELL

    # Install kubectl
    curl -LO https://storage.googleapis.com/kubernetes-release/release/`curl -s https://storage.googleapis.com/kubernetes-release/release/stable.txt`/bin/linux/amd64/kubectl
    chmod +x ./kubectl
    sudo mv ./kubectl /usr/local/bin/kubectl
    kubectl version -o json

    # Create Python Env
    apt-get install -y python3-venv
    sudo apt-get install -y python3-pip
    python3 -m venv venv
    source venv/bin/activate

    # Install OpenJDK Java JDK and Maven
    add-apt-repository ppa:openjdk-r/ppa
    apt-get -y update
    apt-get install -y openjdk-8-jdk
    apt-get install -y maven

    # Install Docker
    apt-get install -y docker.io

    # Install Docker Compose
    curl -s -L https://github.com/docker/compose/releases/download/1.10.0/docker-compose-`uname -s`-`uname -m` > /usr/local/bin/docker-compose
    chmod +x /usr/local/bin/docker-compose

    # Install Jenkins
    wget -q -O - https://pkg.jenkins.io/debian-stable/jenkins.io.key | sudo apt-key add -
    apt-add-repository "deb http://pkg.jenkins-ci.org/debian binary/"
    apt-get -y update
    apt install -y jenkins
    # Echo the Jenkins security key that is required upon initialization
    printf "\n\nJENKINS KEY\n*********************************"
    # Add the Jenkins user to the Docker group
    usermod -aG docker jenkins
    # Wait until the initialAdminPassword file is generated via Jenkins startup
    while [ ! -f /var/lib/jenkins/secrets/initialAdminPassword ]
    do
        sleep 2
    done
    cat /var/lib/jenkins/secrets/initialAdminPassword
    printf "*********************************"
    usermod -aG docker $USER
    newgrp docker
    # restart the Jenkins service so that the usermod command above takes effect
    service jenkins restart

    chmod -R 777 /home/vagrant/gogs
    chown -R vagrant /home/vagrant/gogs

  SHELL
end
Once we have this file, we can start our Jenkins server by typing:
vagrant up
At this point, we're able to access Jenkins at http://localhost:8085/.
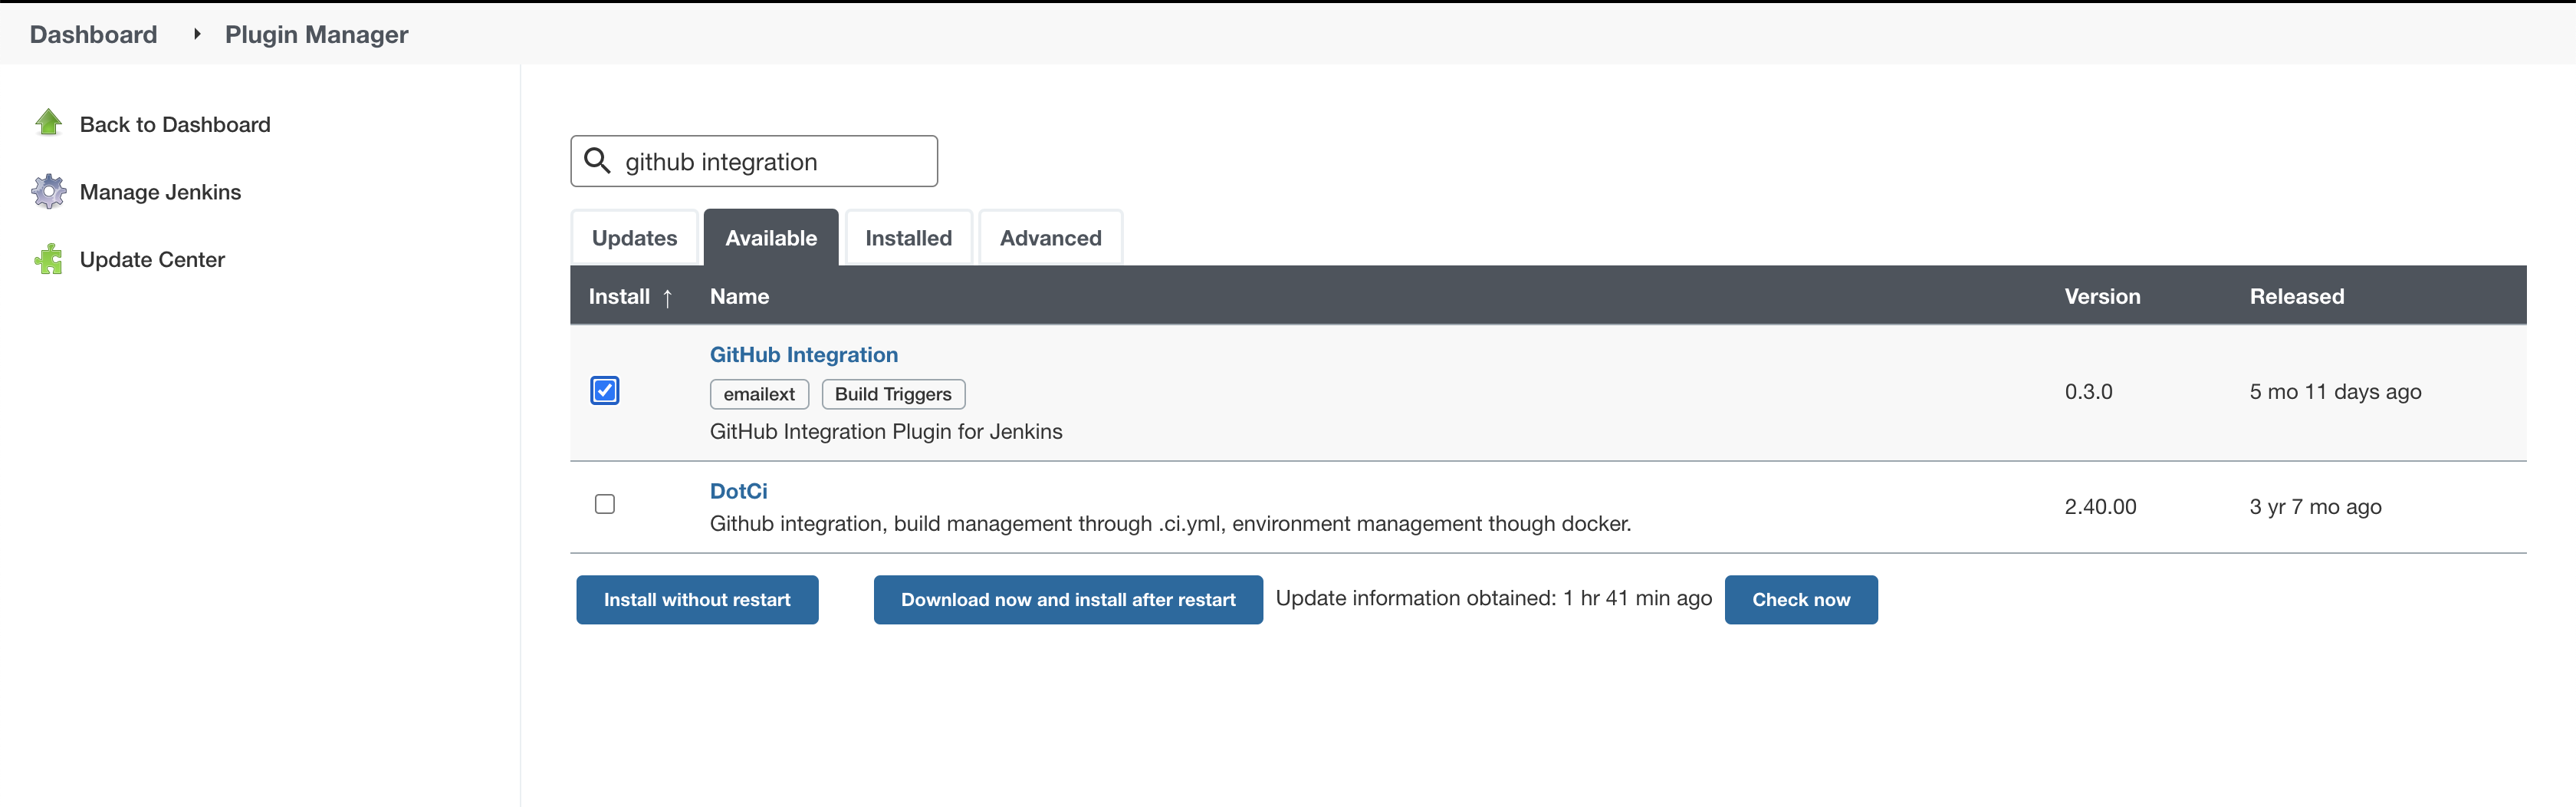
After its auto-installation of plugins, we have to install Git Integration. This plugin enables smooth integration with Git projects.
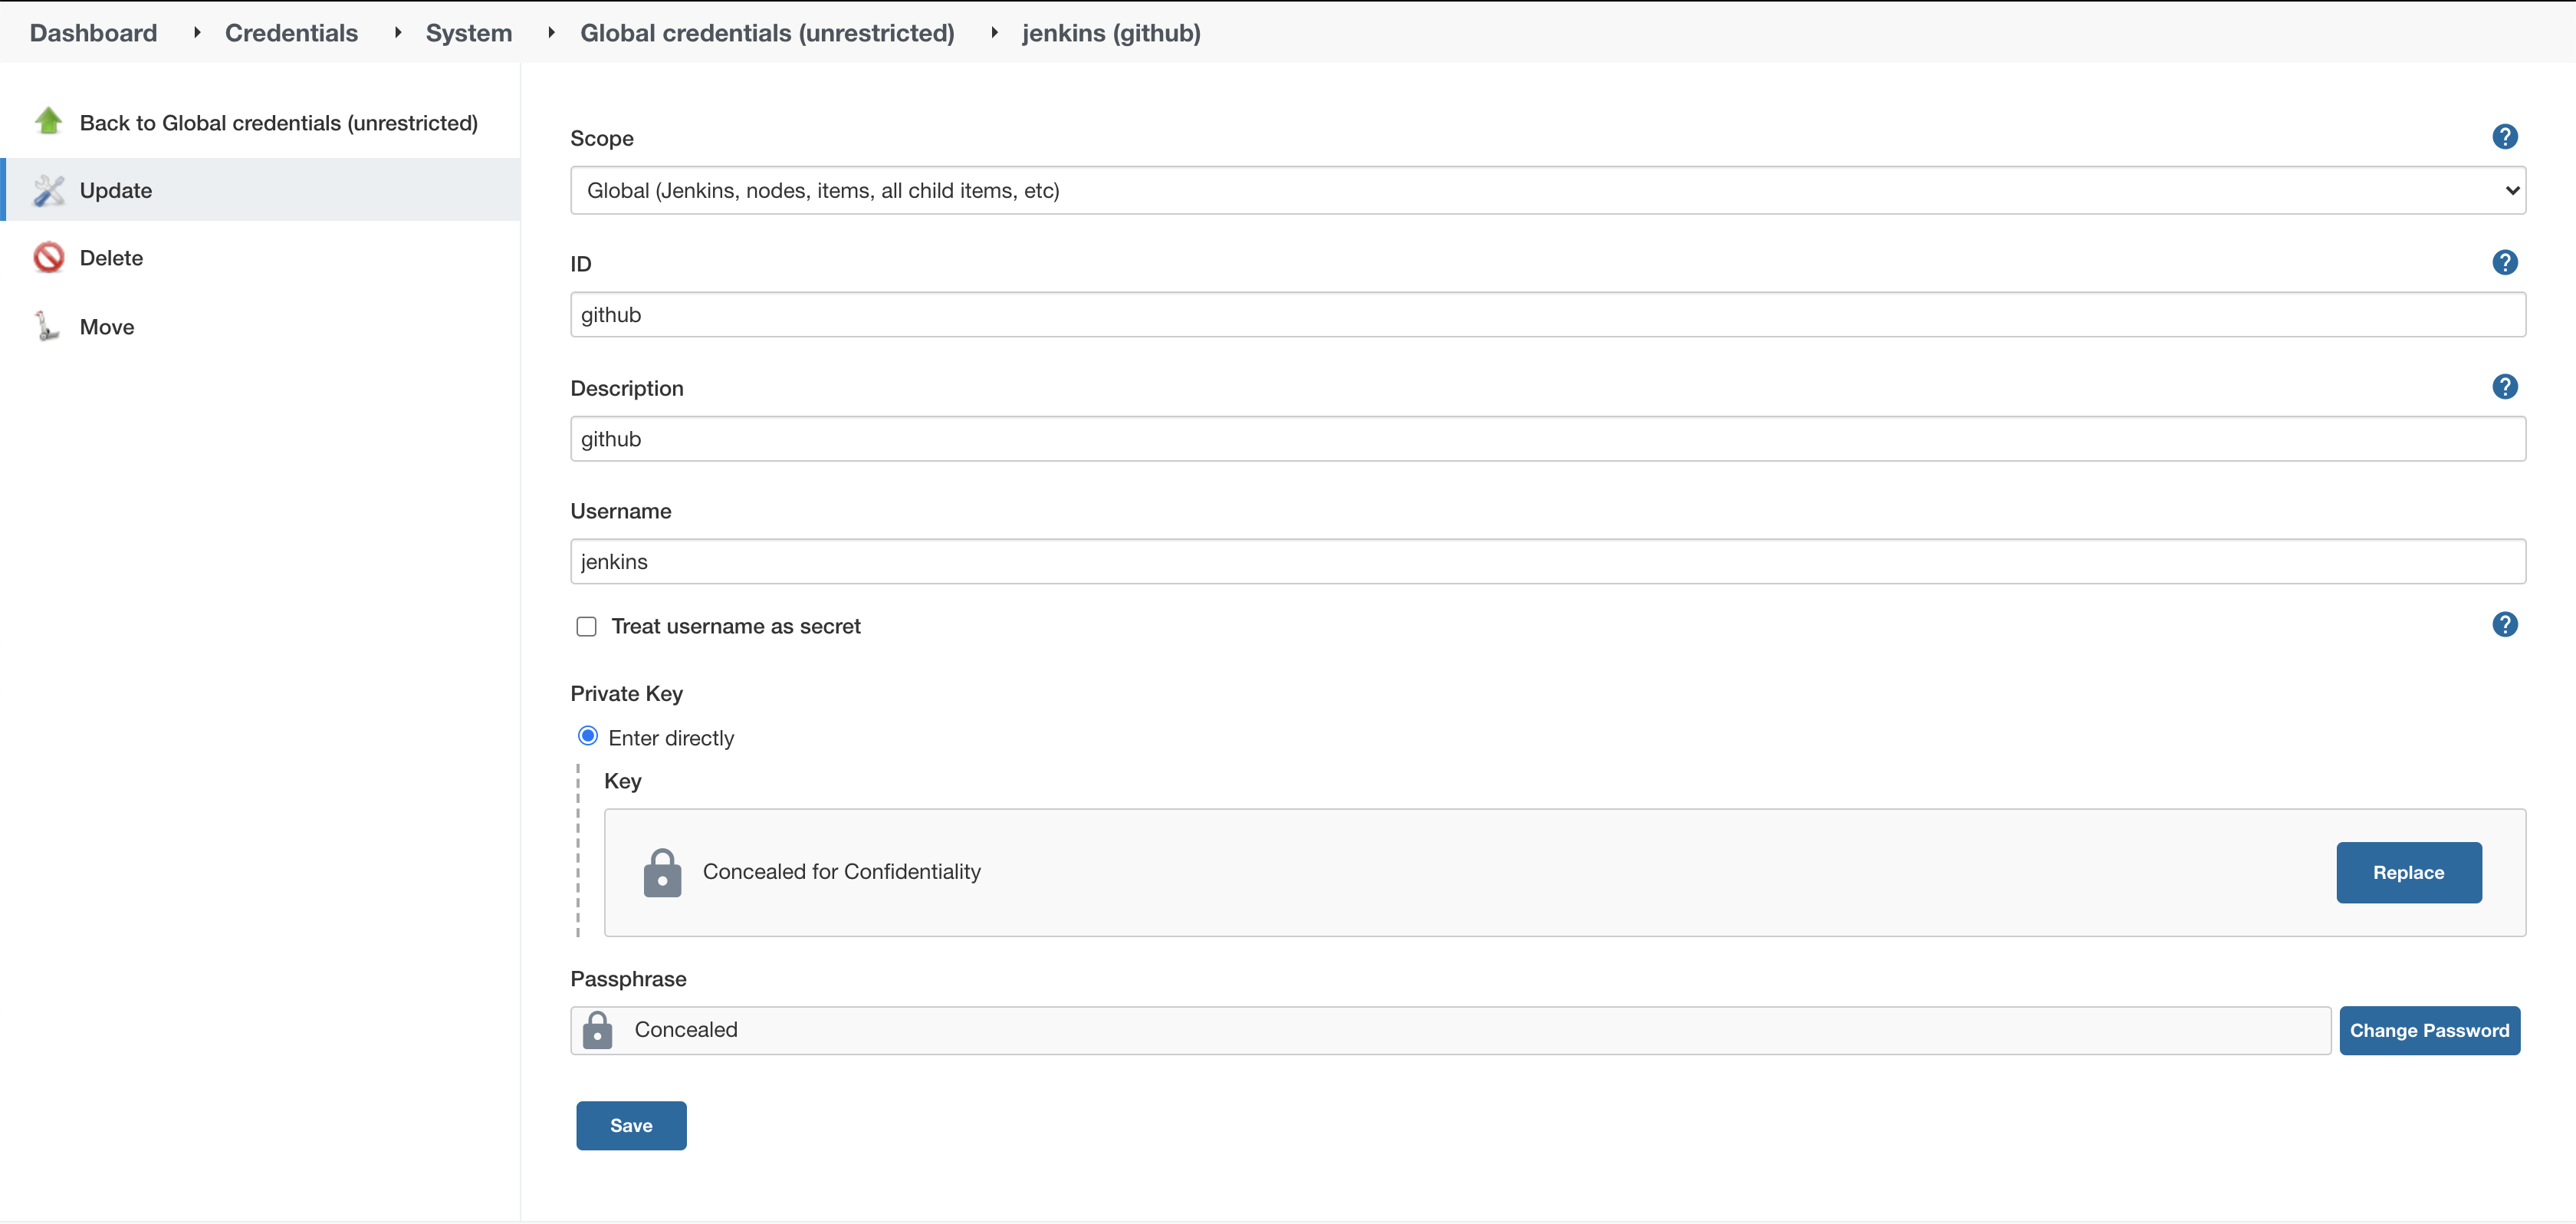
Then, you should create Jenkins credentials to access GitHub via SSH. In this page, copy your private key and paste it in the key area.
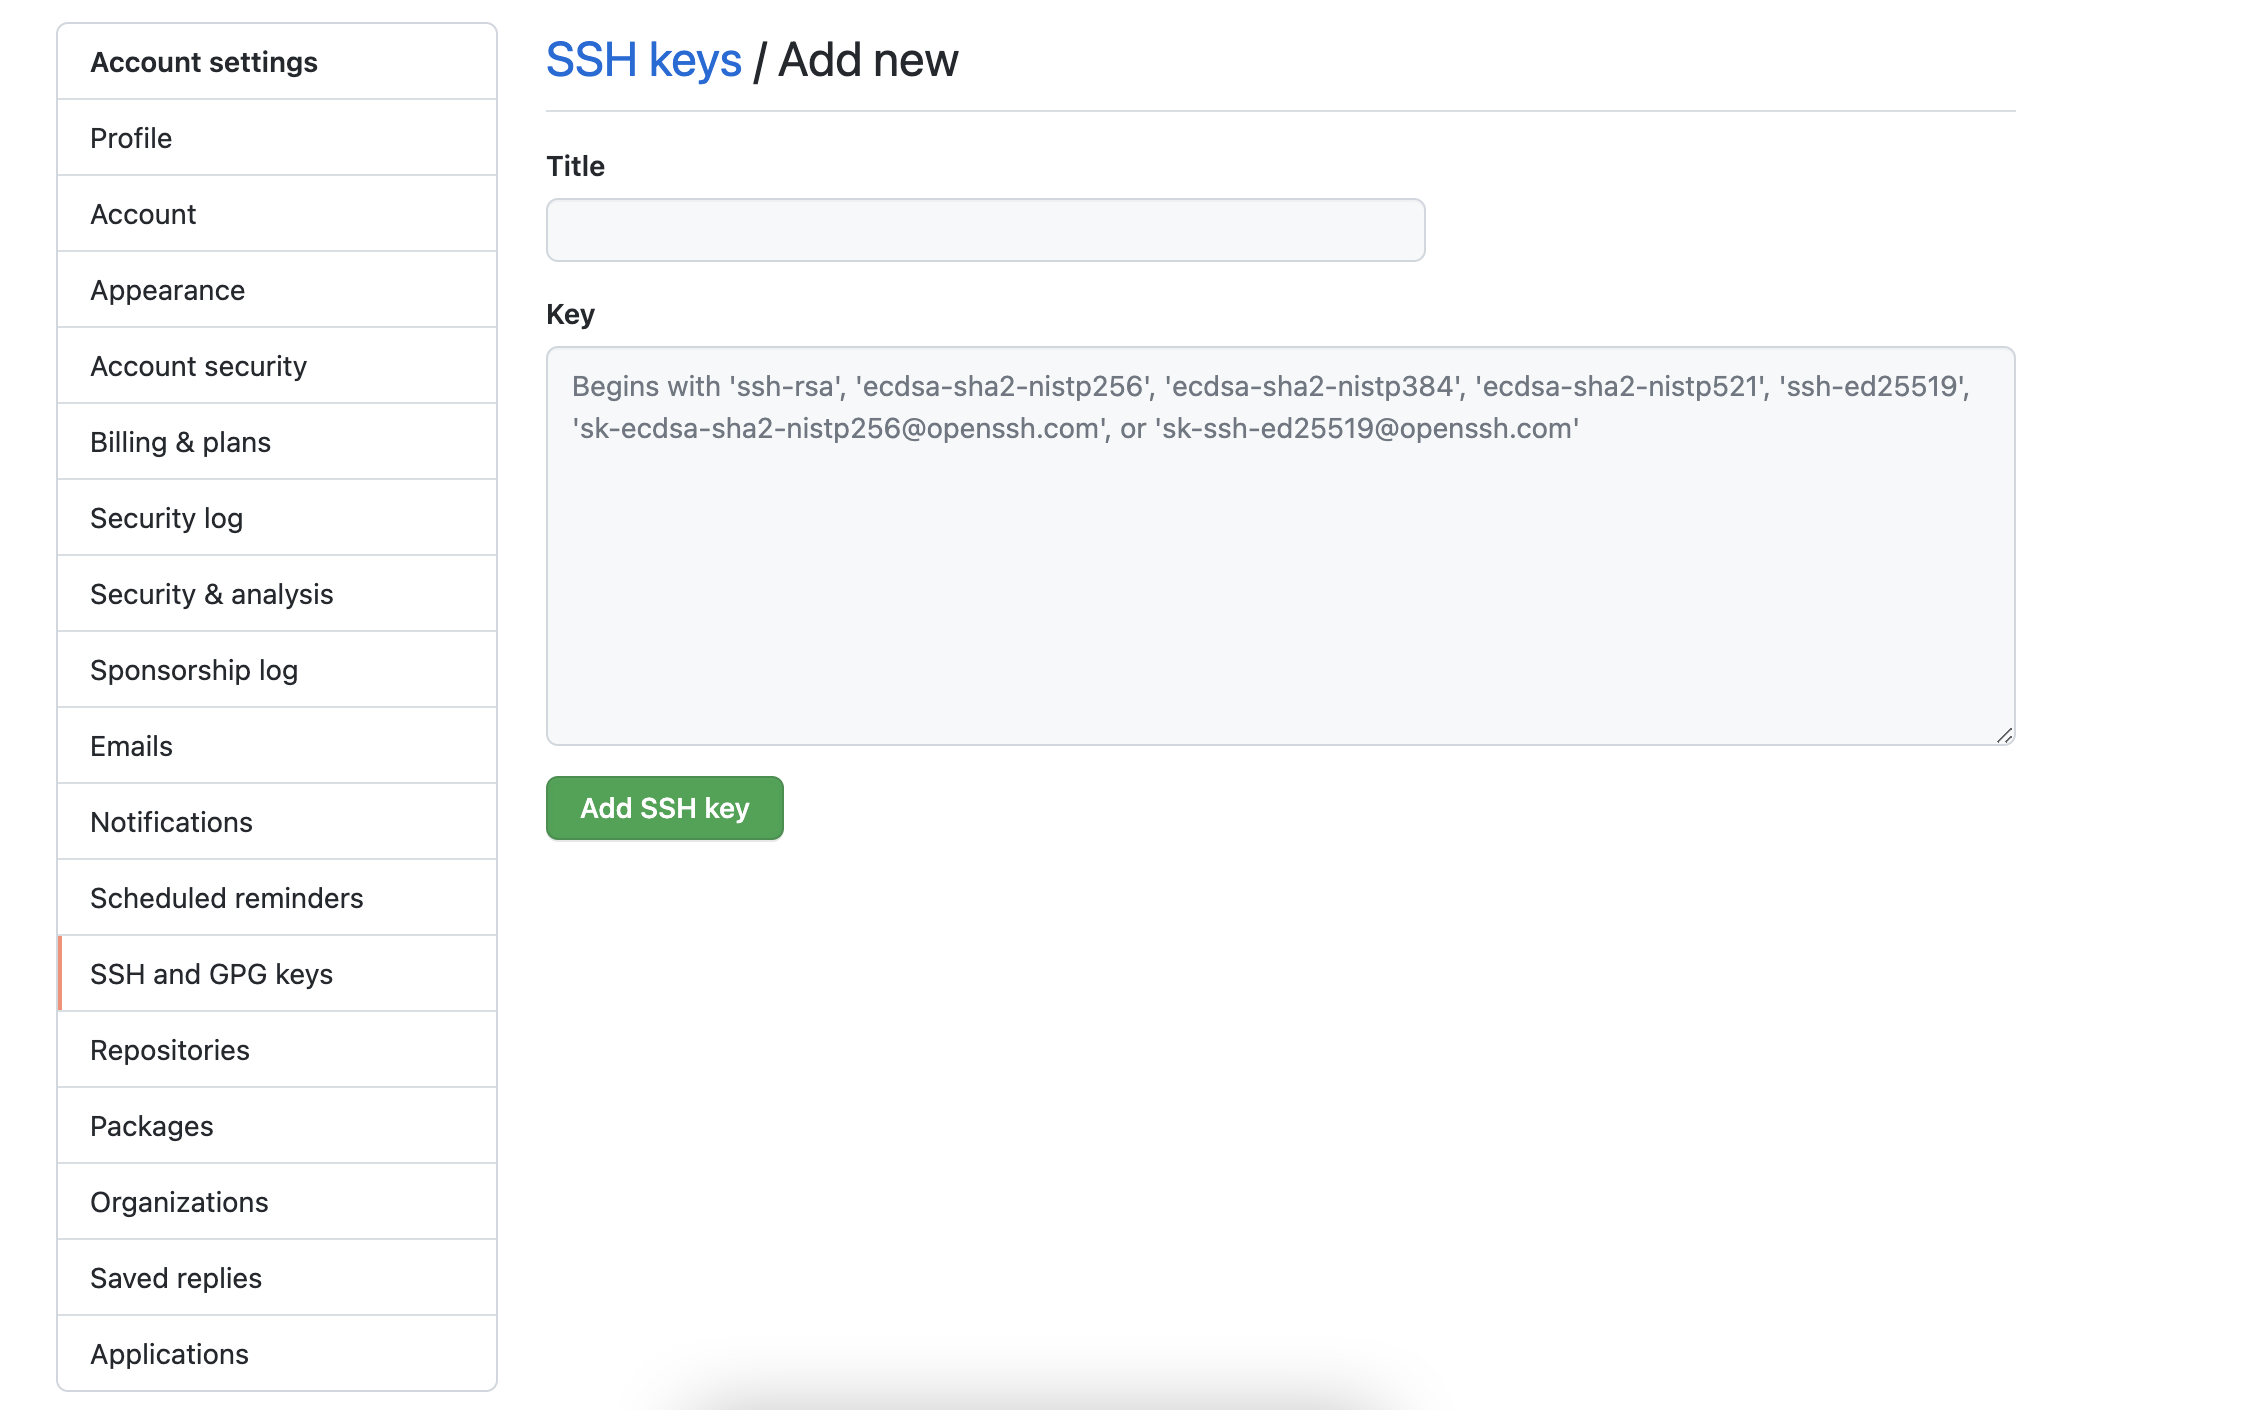
After that, we should create a public key in GitHub. To do that, copy the public key value and paste it in your GitHub SSH configuration.
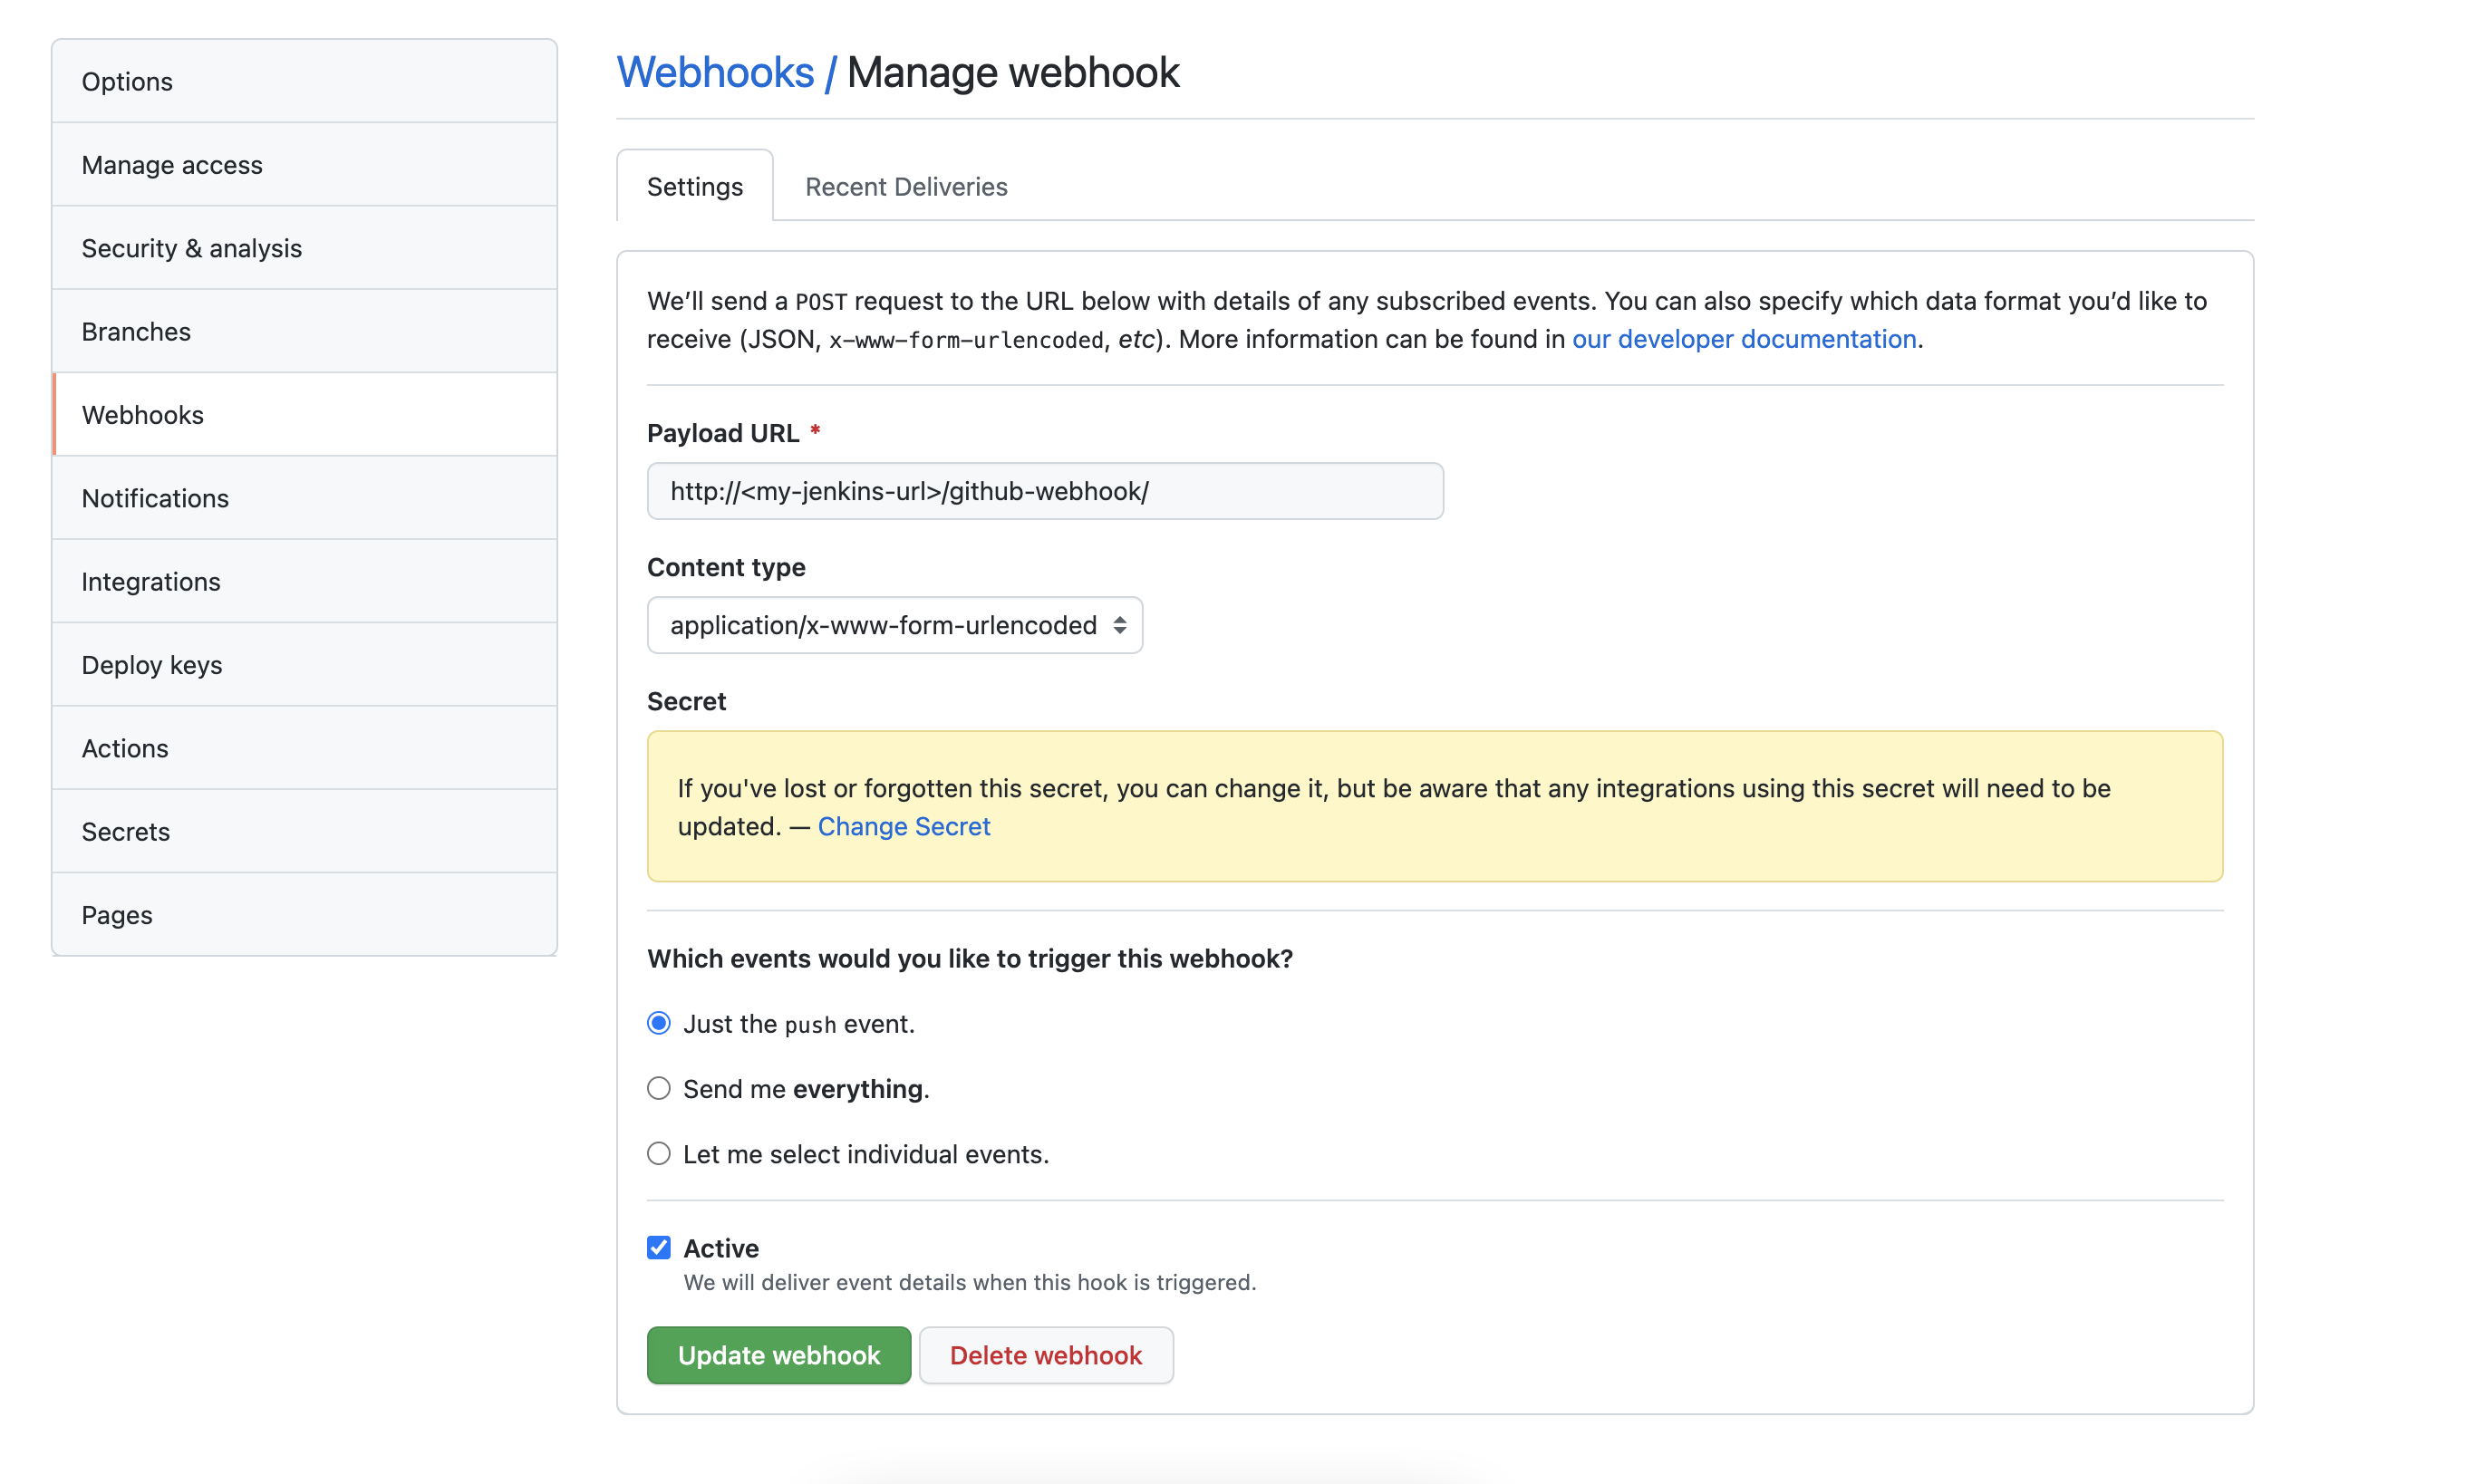
In order to be able to trigger Jenkins' jobs, we should generate a Jenkins token.

Copy this token, access the repository settings, and configure it with the following parameters. Add the token by clicking the "Change Secret" link.
Next step, create a job and set the SCM.

And then, configure the Build Triggers.
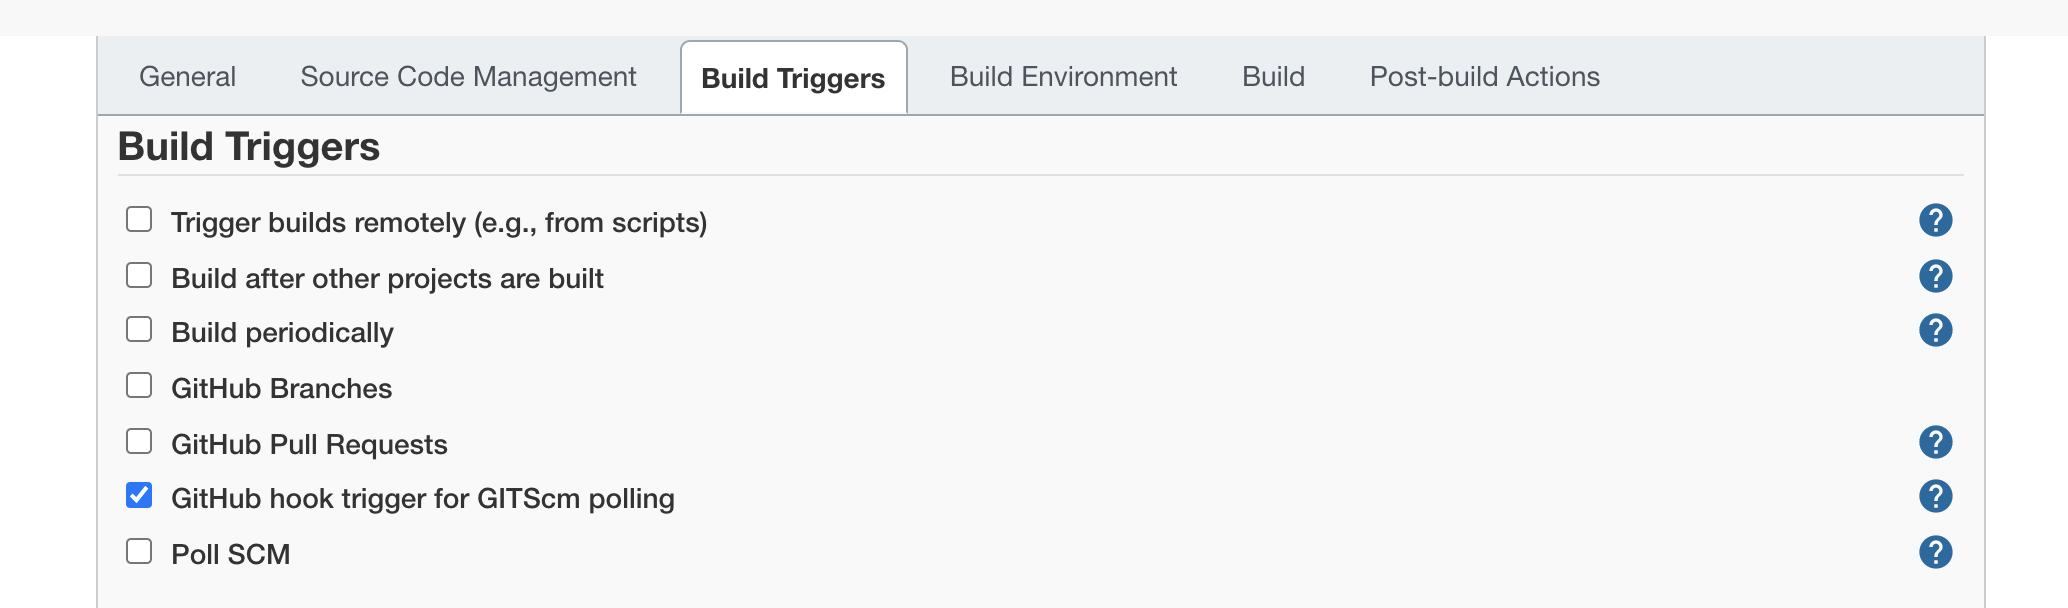
Finally, we're going to configure our build section, adding the script that will spin up a Redis database for integration tests and also the Maven goal which compiles the source code, executes unit tests and integration tests, and lastly reports code quality on SonarQube.
docker-compose up -d

starting=true
until $starting
do
  	sleep 2
    if curl -s http://localhost:8001/health | "OK"; then
    	starting = false
    fi
done

Before testing our integration, first, we have to run our SonarQube server.
SonarQube
SonarQube is a tool that performs inspection of code quality by automatically reviewing code with static analysis to detect bugs, code smells, and security vulnerabilities.
Create a folder called sonar-qube and then put into it a file called Vagrantfile with the content below.
# -*- mode: ruby -*-
# vi: set ft=ruby :

# $script = <<-SCRIPT
#   echo 'My Custom Script...'
# SCRIPT

# All Vagrant configuration is done below. The "2" in Vagrant.configure
# configures the configuration version (we support older styles for
# backwards compatibility). Please don't change it unless you know what
# you're doing.
Vagrant.configure("2") do |config|
  # The most common configuration options are documented and commented below.
  # For a complete reference, please see the online documentation at
  # https://docs.vagrantup

.com.

  # Every Vagrant development environment requires a box. You can search for
  # boxes at https://atlas.hashicorp.com/search.
  config.vm.box = "hashicorp/bionic64"
  # config.vm.box_version = "20170922.0.0"
  # config.vm.provision "shell", inline: $script

  config.trigger.after :up do |trigger|
    trigger.name = "Starting SonarQube"
    trigger.run_remote = {inline: "./sonarqube-6.1/bin/linux-x86-64/sonar.sh start"}
  end

  config.vm.network "forwarded_port", guest: 9000, host: 9000

  # config.vm.network "public_network", ip: "192.168.33.18"
  config.vm.network "private_network", ip: "192.168.50.5"

  config.vm.provider "virtualbox" do |v|
    v.memory = 4096
  end

  # Enable provisioning with a shell script. Additional provisioners such as
  # Puppet, Chef, Ansible, Salt, and Docker are also available. Please see the
  # documentation for more information about their specific syntax and use.
  config.vm.provision "shell", inline: <<-SHELL

    apt-get update
    sudo apt-get install -y unzip

    # Install OpenJDK Java JDK and Maven
    # Install OpenJDK Java JDK and Maven
    add-apt-repository ppa:openjdk-r/ppa
    apt-get -y update
    apt-get install -y openjdk-8-jdk
    apt-get install -y maven

    # Install Sonar
    wget https://binaries.sonarsource.com/Distribution/sonarqube/sonarqube-6.1.zip
    unzip sonarqube-6.1.zip

    chmod -R 777 sonarqube-6.1/
    chown -R vagrant sonarqube-6.1/

  SHELL
end
Run the server by typing the command below.
vagrant up
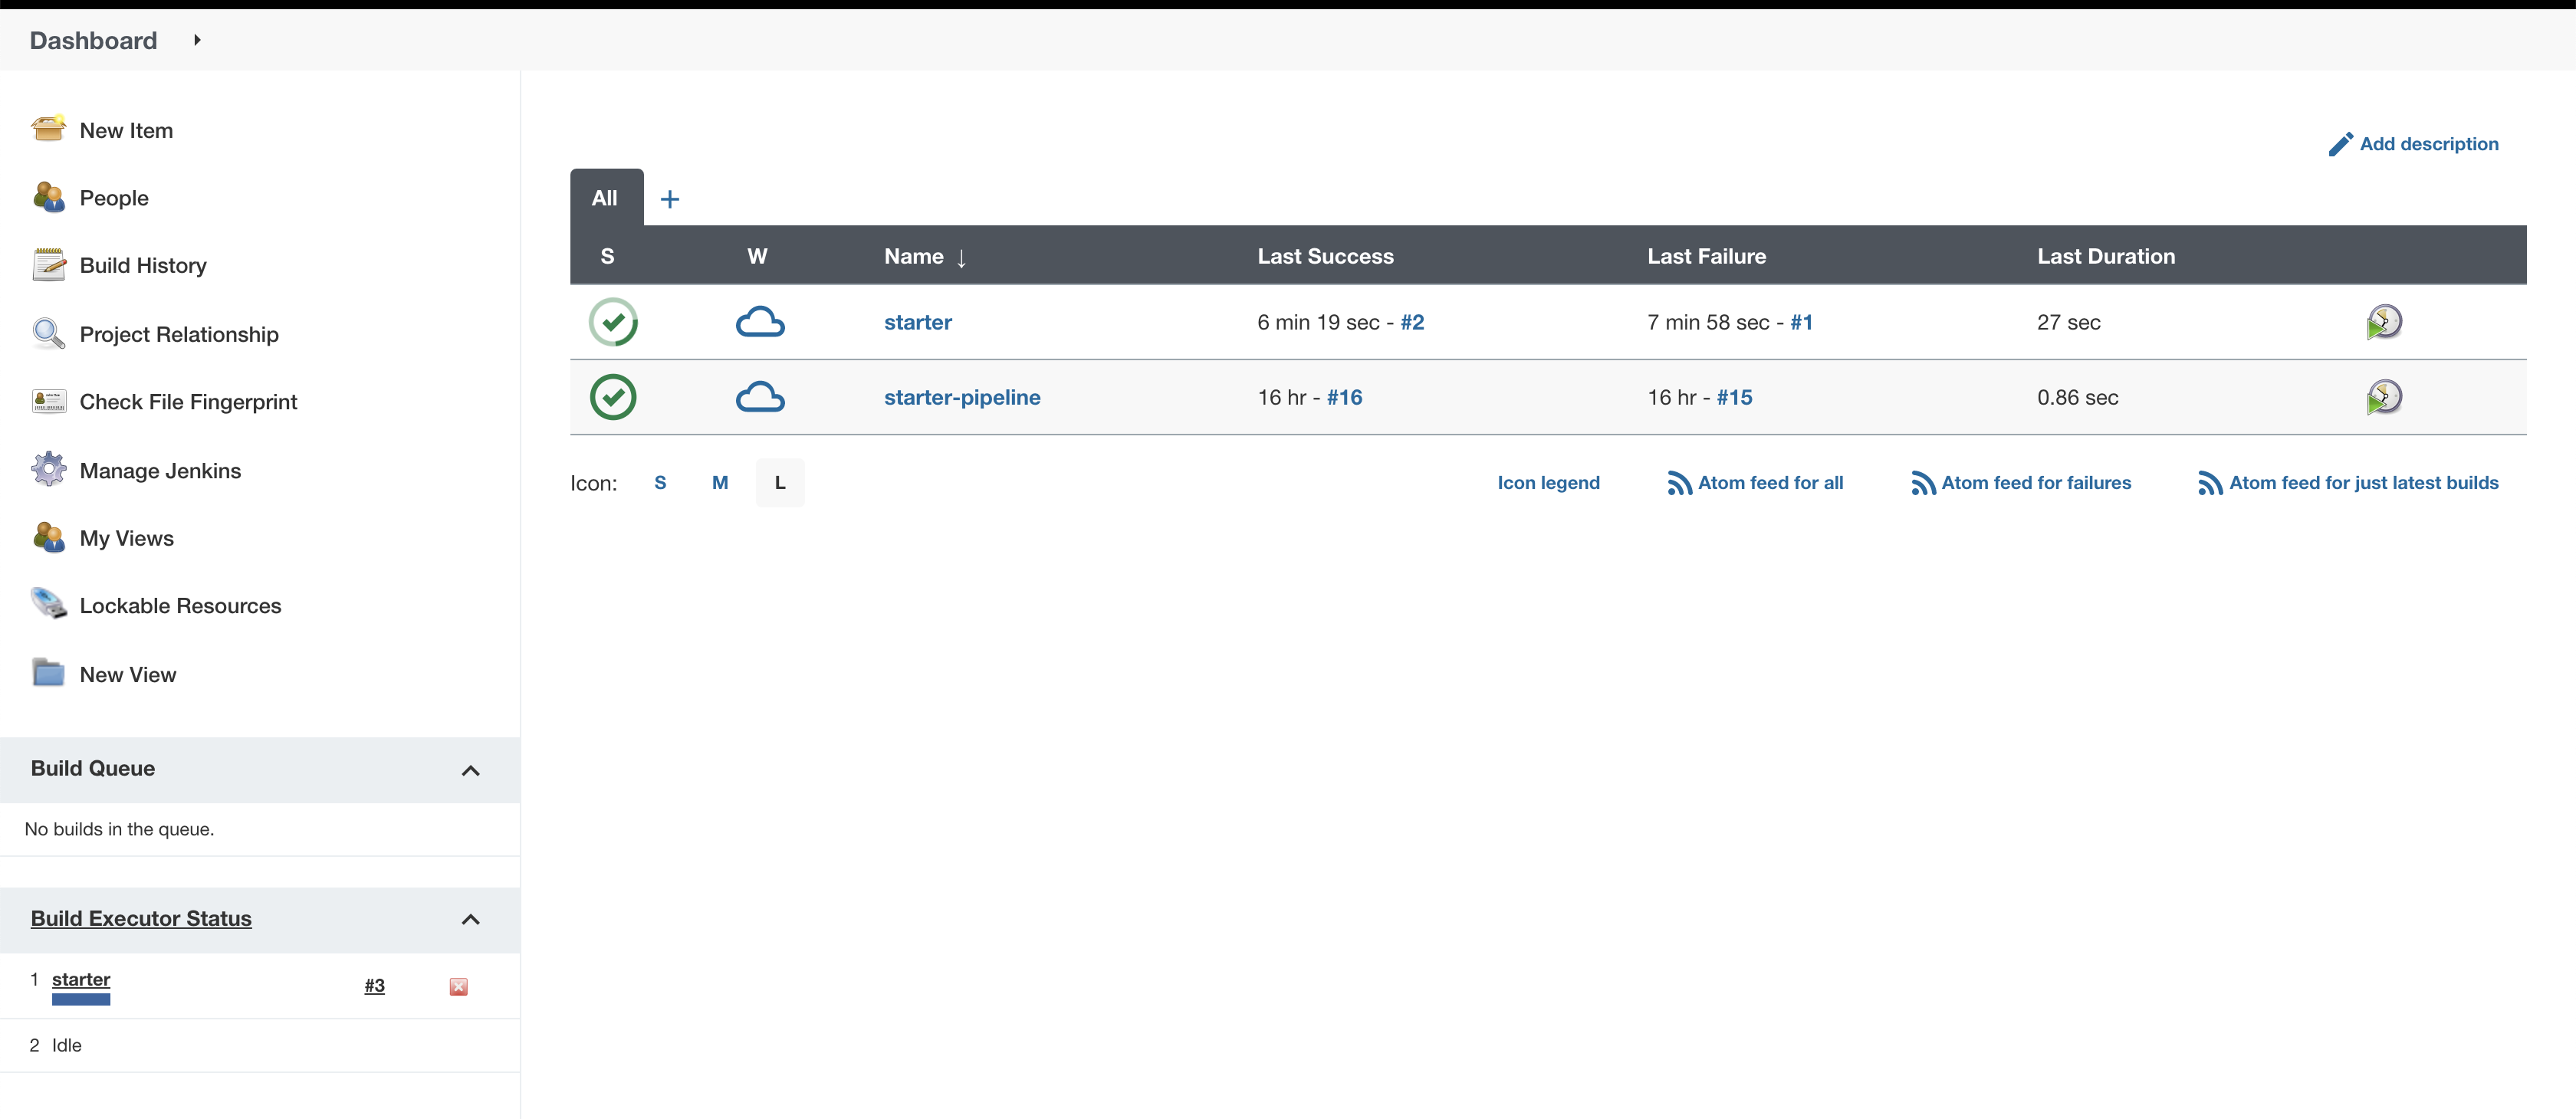
At this point, we're able to test our continuous integration by making some changes in the code and pushing it. You'll see that once GitHub receives the push, Jenkins starts the job automatically.
After the build, we're able to see the code quality analysis on SonarQube.
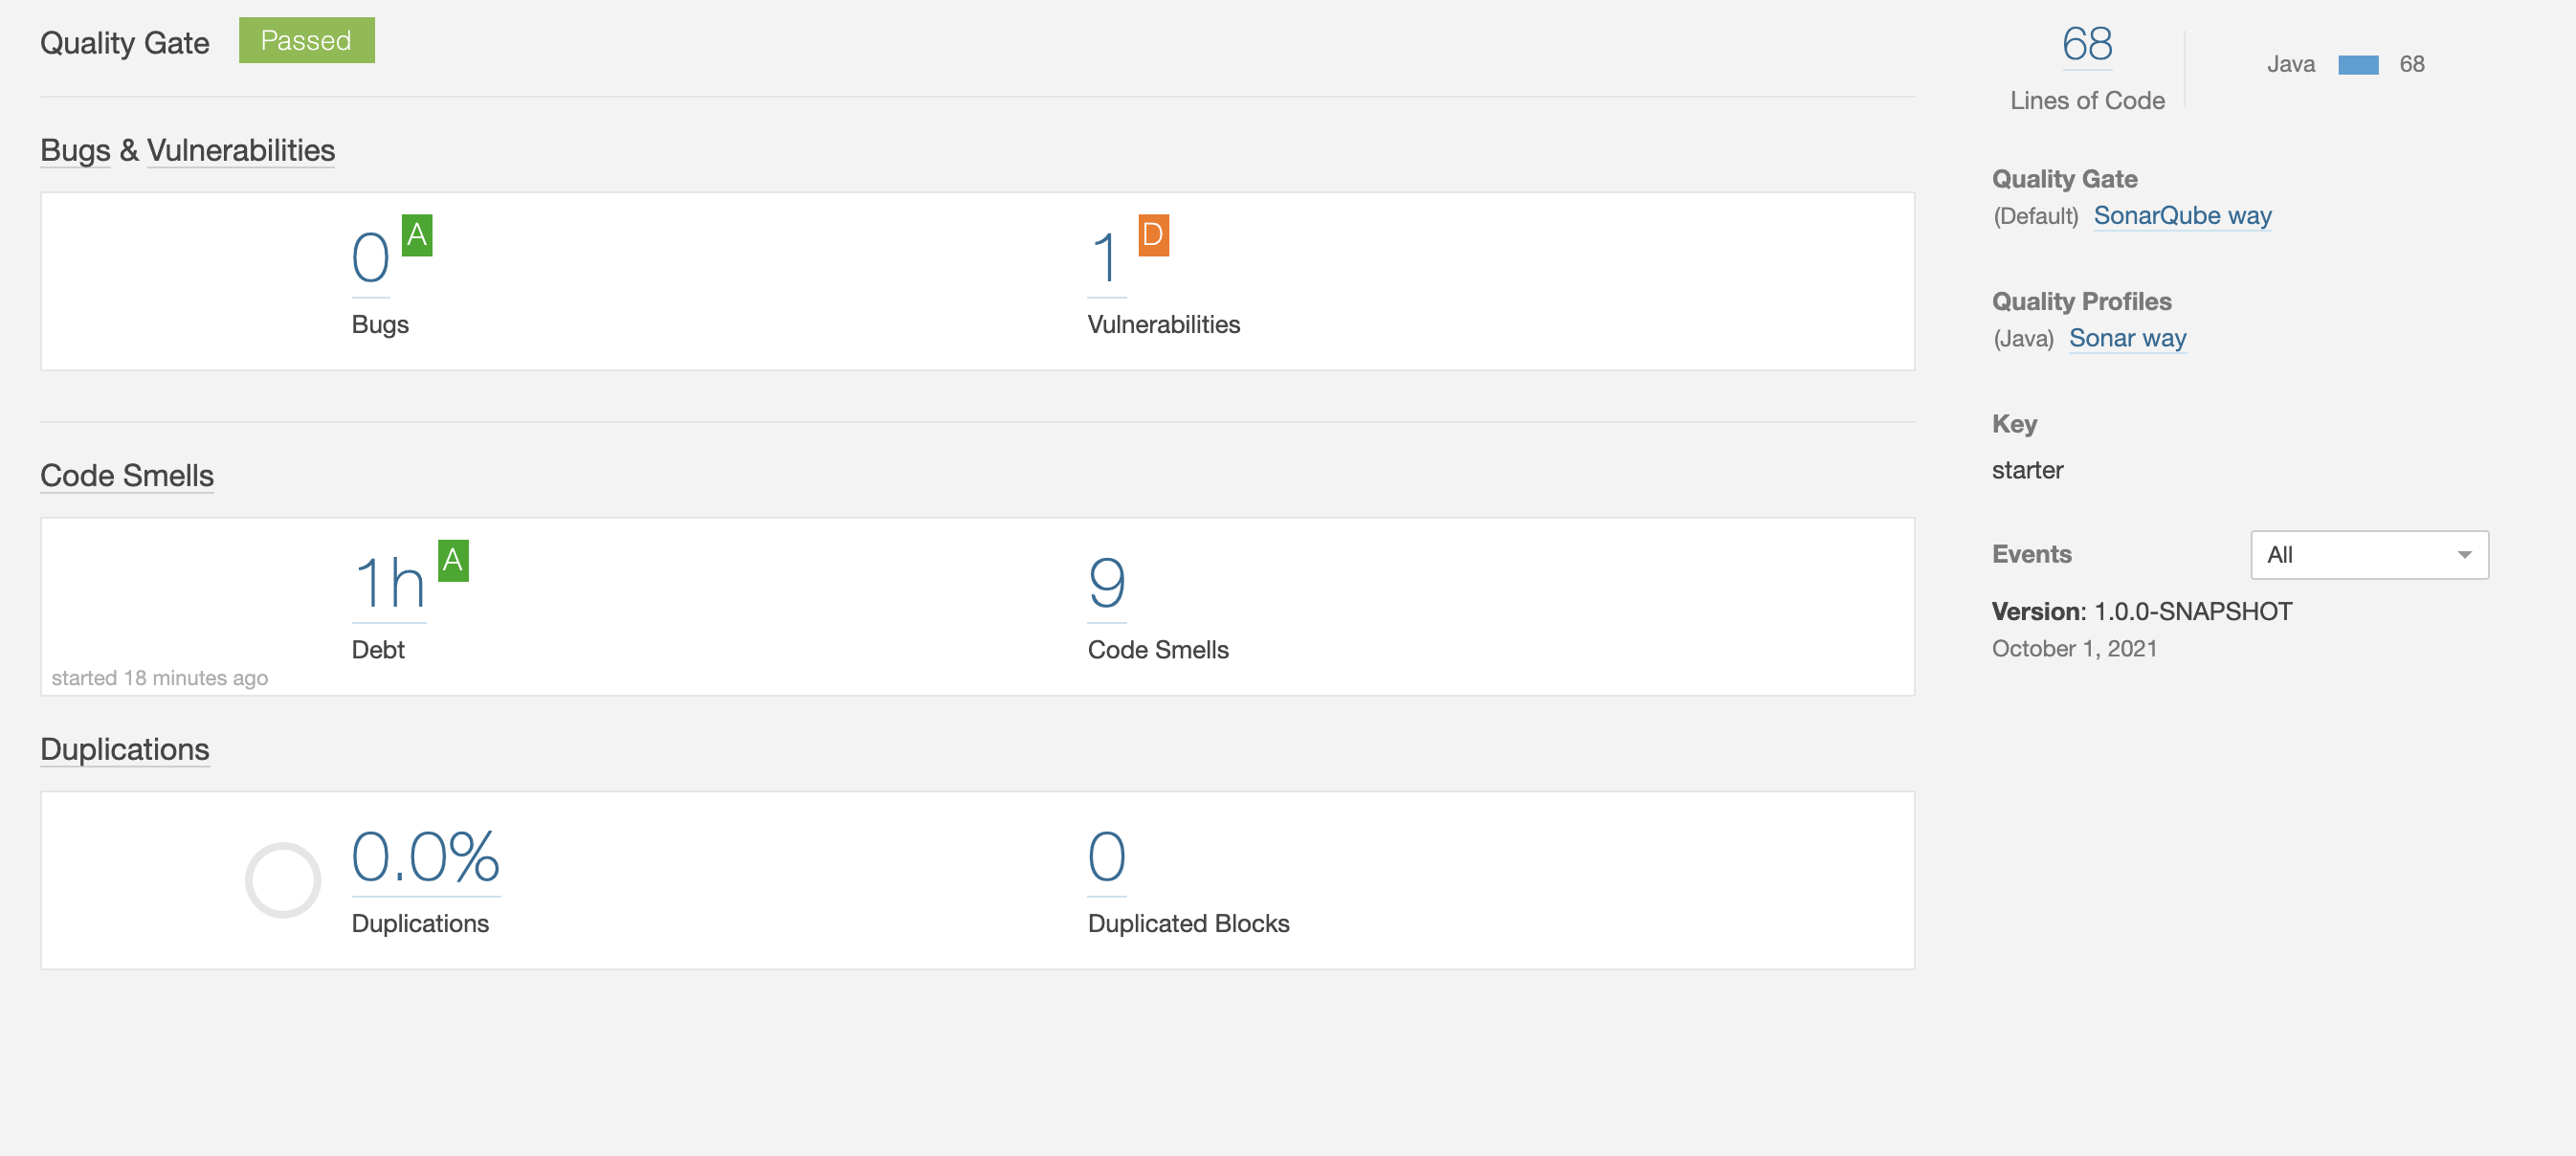
That's how we can configure a simple CI server using Jenkins. Jenkins is a powerful and flexible tool to handle CI and CD, and it has many configuration options that you can explore to go from simple to complex pipelines to automate the software development processes.